Create New Microsoft 365 Tenant
In this guide, you’ll learn how to create your first Microsoft 365 Tenant for your organization.
If you already have a 365 tenant and need multiple tenants refer to the guide Add Additional 365 Tenant.
Prerequisites
Section titled “Prerequisites”- A valid email address
- This is used to sign up and becomes the initial Global Administrator account.
- A unique tenant name
- This creates your default domain in the format: yourtenant.onmicrosoft.com.
- Microsoft Authenticator App
- This is used to setup multi factor authentication
- Basic organization details
- Company name, country/region, address, phone number are required.
- Payment method
- You can still start a free trial but a payment method is required to complete the setup.
How to Create a 365 Tenant
Section titled “How to Create a 365 Tenant”-
Sign up for a Microsoft 365 Plan
- Tip: You can start for free by clicking on
Try for Freeon any of the plans.
- Tip: You can start for free by clicking on
-
After selecting a plan fill out the subscription details and click
Next -
Enter your work or school email address and click
Next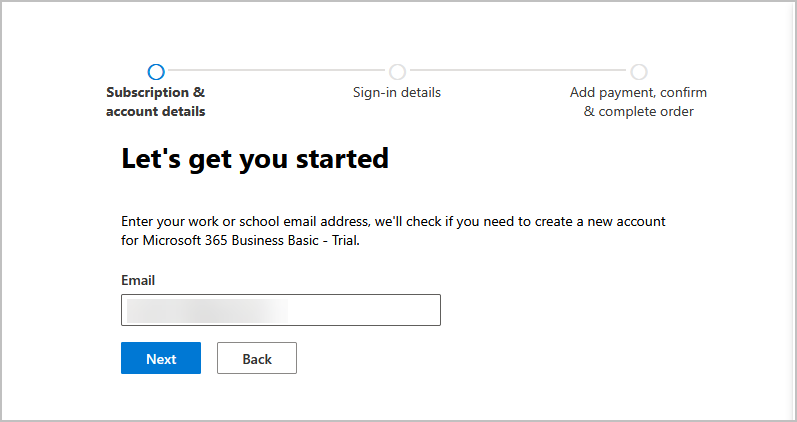
-
Click
set up account
-
Fill out the required fields and click
Next
-
Enter your username and domain name. You can change the domain name later if needed.

-
Add payment method. Your first month is free but payment details is required to complete the setup.

-
Review and confirm your information and click
start trial.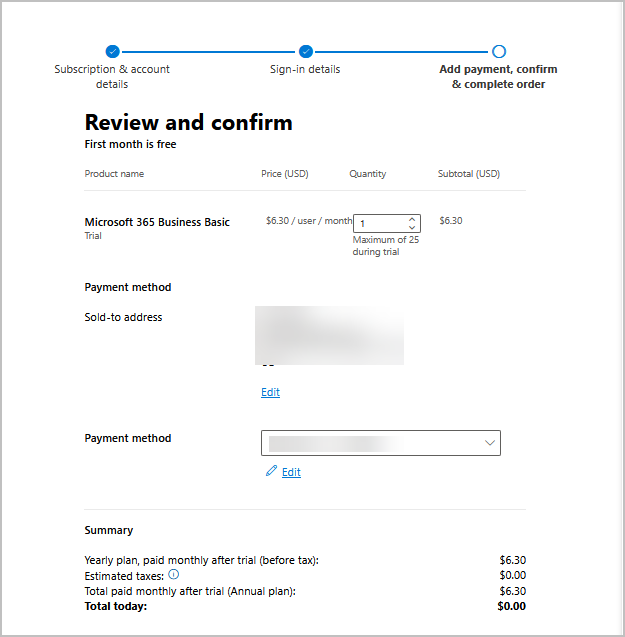
-
Click
Nexton the add extra security to your account page. -
You will be prompted to sign in and setup MFA.
-
You will be prompted to install Microsoft Authenticator. Install it on your phone and click
Next
-
Click
Nexton the set up your account in app screen. -
Open the Microsoft Authenticator app on your phone. There should be a QR icon, click it and scan the QR code that is on the screen.
Example Microsoft Authenticator App Screen

Example QR code that you will scan with the app

-
The account should now be added to your authenticator app. Click
Next. -
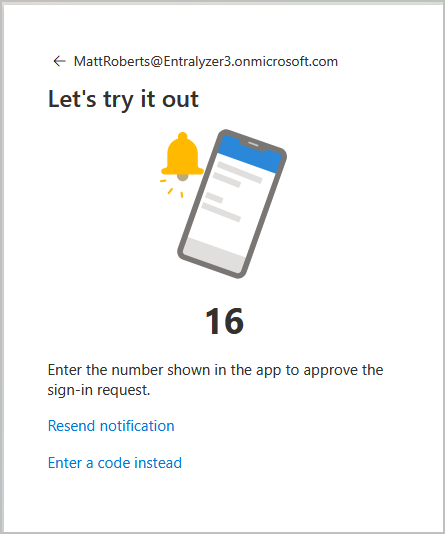
A number will be show on the screen. Enter the shown number in the authenticator app.
-
You should get a message that authenticator was added. Click
Done. -
Click the button on the page that says
Start using your new product. Your button may be different, it just depends on wht plan you picked.
-
You should now have access to the 365 Admin center and can start using and managing your product.

Conclusion
Section titled “Conclusion”In this guide, you learned how to setup a new Microsoft 365 tenant. This guide can be used to test and trial Microsoft 365 services or to setup your real business. Creating a Microsoft 365 tenant provides the foundation for managing users, services, and security in your organization. Taking the time to set it up correctly from the start helps ensure a smoother experience and makes ongoing administration easier as your environment grows.